If you are interested in learning another basic embroidery stitch then this is the post for you! The SATIN stitch is great beginner stitch to learn! It is used as a filler to cover small areas of background fabric. It's a series of long straight stitches lying next to each other that give the appearance of satin, thus the name. There are so many ways to use the satin stitch. In this example, I will show you step-by-step how to make the satin stitch then use it to make some festive fall leaves.

To get started you will need a piece of fabric. I used a piece of linen but cotton fabric will work great too. I also recommend an embroidery hoop. Make sure that your fabric is larger than your hoop by about an inch and a half so it will remain taut and easy to work on. To learn more about placing your fabric in an embroidery hoop you can click HERE.
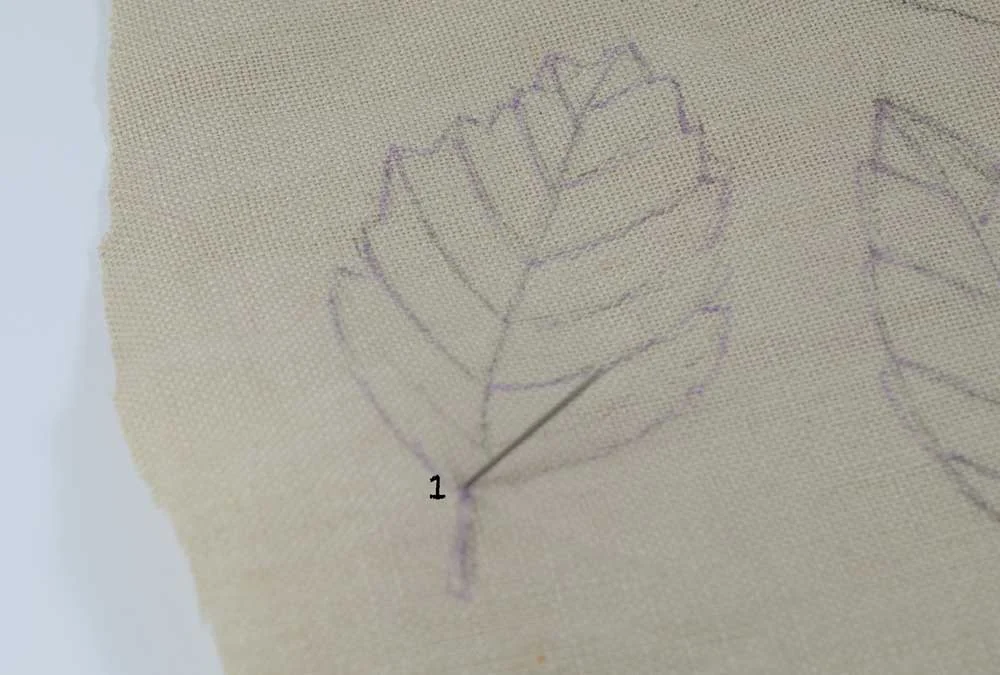
I started by sketching a basic leaf design right on my fabric using a mechanical pencil.

Now that I have my basic leaf outline, I draw two parallel lines. This is to practice the satin stitch before getting started on the leaf.

I use a size 5 embroidery needle and thread it with all six strands of an 18 inch length of embroidery thread then knot the other end. Pull the needle up from the back of the fabric where I have labeled the number "one".

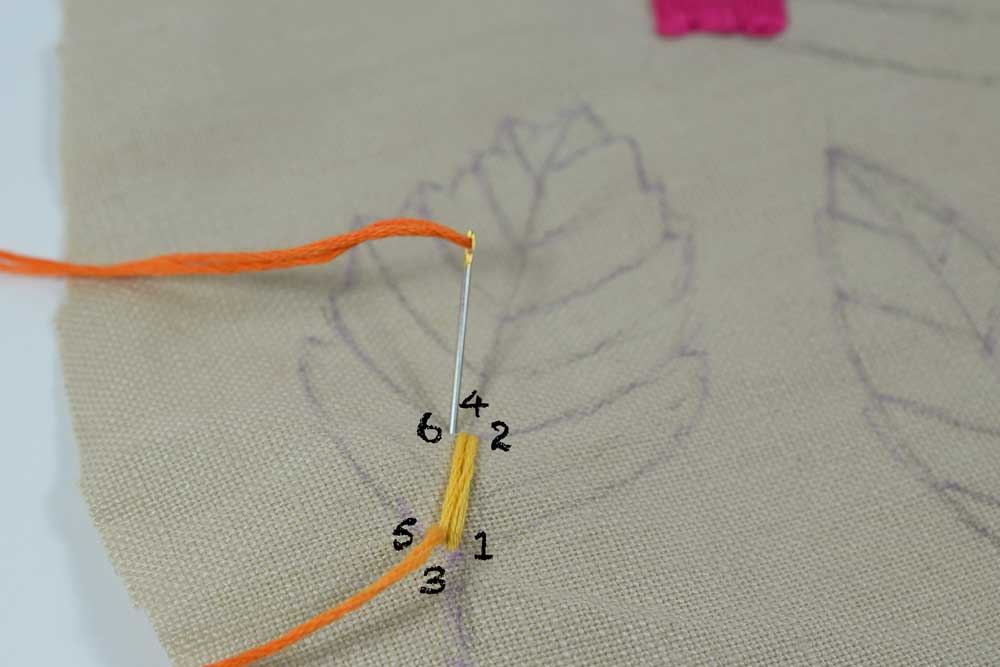
Once you have pulled the needle all the way through the fabric until the knot anchors the thread at the back, put the needle back down where I have indicated "two" on the picture (directly below where you brought the needle up through the fabric).

O.K, so your brought the needle up through "one" and back down through "two". Now you want to bring your needle up through "three" and back down through "four". When you are finished, you will have two straight stitches lying right next to each other. That, my friends, is the satin stitch!

Keep making the same stitch to practice. It takes a little practice to keep the lines even. No need to be concerned about this, You can neaten the edges with a backstitch at the end if you like.

Here is the satin stitch I just made. Just to show you what it looks like, I added a backstitch around the edges. Totally optional!
So now that you are confident with the satin stitch, let's put those skills to use to make a leaf.

For this leaf project, I am using variegated thread. What is neat about this thread is that the color changes continuously along the thread. This thread is available wherever you get your embroidery supplies. Feel free to use all one color or a different color for each section of leaf. It's totally up to you!
Choose a section of your leaf to begin on. I am choosing the bottom left section. Here you have a choice to make. Your satin stitch can go up and down or horizontally. If you decide to go horizontally, the stitches will be a lot longer. The longer the stitch, the more likely it will cinch and pucker the fabric so you need to have a light touch here. Pull the thread tight enough to make it lie flat but not so tight that it cinches the fabric.
I am going to start with vertical stitches in this section.

I pull my thread up through "one" and then place the needle back down through "two" to make my first stitch.

Now I pull the needle back up through "three" right next to where I brought the needle up at "one".
I bring the needle back down through "four" and then back up through "five" and back down through "six". Keep going along this section following the line of the section as best you can.

For the second section of the leaf I make my stitches horizontal to add some interest. I continue alternating vertical and horizontal for each section of the leaf.

I finished the leaf by adding some backstitch around the edges. If you you are not familiar with backstitch and would like to learn, click HERE.

For my other leaf, I used a variegated yellow. In this example, I made all the stitches go in the same direction and did not add the backstitch. Pretty easy, right? This would be fun on a pair of jeans or a shirt! If you would like to learn more about transferring designs on a dark fabric, such as denim click HERE.
Once you sketch out your pattern simply place the hoop around it and satin stitch away!


It's as easy as that! Learn a new skill, brighten up your wardrobe and get festive with this fun autumn project!
Thanks so much for stopping by!
Warmly,
Pam