Recently I was perusing through Anthropologie. This is one of my favorite places to browse, drool and get inspired. I noticed a lot of embroidery embellished jeans. They were so cute so I thought it might be fun to make a really simple Anthropologie inspired pair of jeans using skills from the last blog post, the satin stitch. You can click HERE to refer back to that post if you like.
So grab an old pair of jeans and let's get started.

Here is what you will need:
1. A PAIR OF JEANS: Try to pick ones that are not too thick so they will be easier to sew through.
2. A SMALL EMBROIDERY HOOP: I used a 5 inch hoop but you can go smaller. It is just used to make the fabric tight while you are sewing it.
3. DIFFERENT COLORED EMBROIDERY FLOSS: A great idea is to pick colors that are in your wardrobe palette. Maybe you have a crazy shirt you are always trying to coordinate with pants. I used cotton DMC six strand embroidery thread.
4 A SHARP NEEDLE: You will want a thick needle with a big eye that is very sharp at the end. It should be meant for thicker fabrics like canvas or denim.
5. SCISSORS: A sharp little pair of scissors or snips to cut your thread.
6. A WHITE GEL PEN: This is fantastic for marking dark fabric. Chalk is another option or white colored pencil
7. A QUARTER OR PENNY: You will need something small and round as a template for making small circles.
Let's get started!
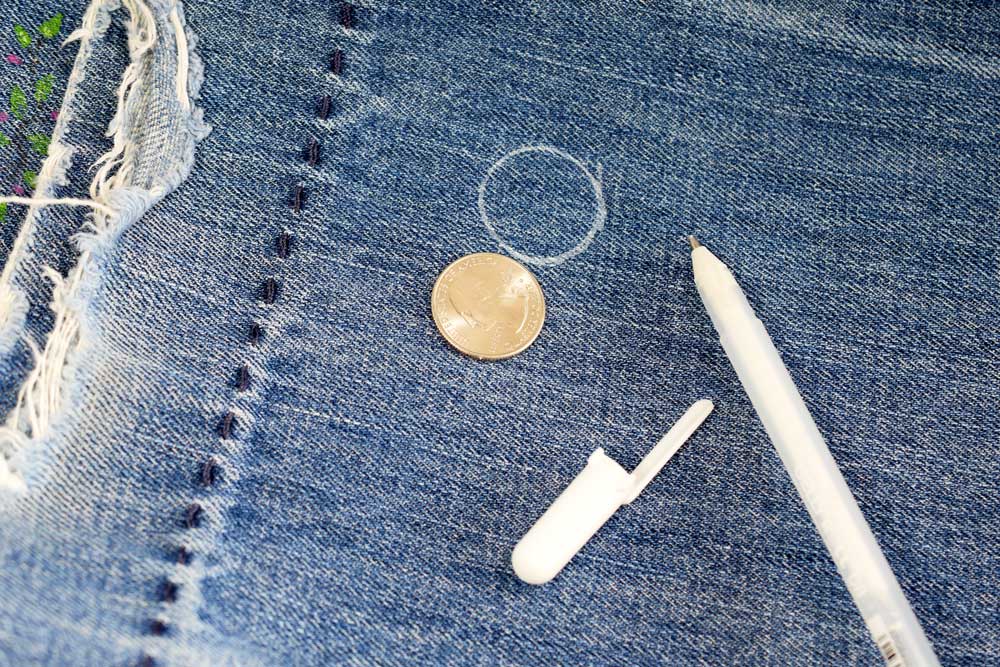
Use your quarter and your gel pen to trace circles. I chose the bottom of the left pant leg. If you have a good eye for spacing just make some circles spaced out evenly on the bottom of the pant leg. You can use a ruler if you are not comfortable just eyeballing to make sure your circles are evenly spaced.

Once you are satisfied with your circles, place your hoop over one of them. Put the smaller inner hoop inside the jeans then place the outer hoop on top with the jeans in the middle. If you need to, roll up the jeans so you have better sewing access from the bottom.

Thread your needle and knot the other end. I used all six strand because I wanted a nice thick thread. Using the circle as your guide, use your satin stitch to fill in the circle.

I outlined mine in backstitch to neaten the edges but this is totally optional. If you would like to learn the backstitch click HERE. It is a fantastic stitch to learn with so many applications.

I made a variety of different colors but you could stick with one color. Whatever you want! My reasoning was that the more colors I chose, the more things I could wear them with. If you are going with variety try to space them so that no two of the same colors are right next to each other.


That is really all there is to it,
Variations are endless. You can just do the bottoms. You could do polka dots going up one leg or even cover the entire pair of jeans. Black and white polka dots would be fun and classic or a metallic thread would add some fun sparkle too!

Add some decorative stitching at the bottom.
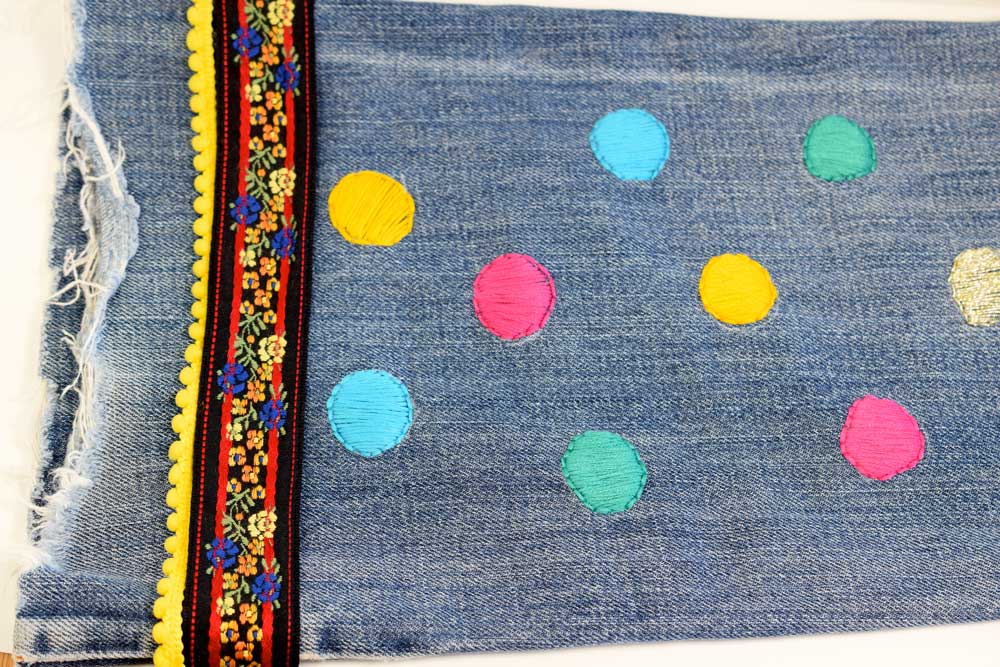
Add some decorative edging like miniature pom-poms or the embroidered ribbon I found at the fabric store.


Pair it with you favorite crazy shirt!
So much fun and a fantastic way to practice your new satin stitching skills!
Thanks for stopping by!
Warmly,
Pam