Hi everyone!
For today’s post, I thought I would create a free printable embroidery pattern for you to try. It has different folk art elements that your can apply to a number of projects which I will be showing you in the next few posts. Stitching is so grounding and relaxing, I really hope you will give it a go. It keeps your hands active while you can engage your mind with your favorite podcast or a Netflix special. I even do it in my backyard with the just the sounds of chirping birds (and neighbor’s landscaping equipment, lol.)
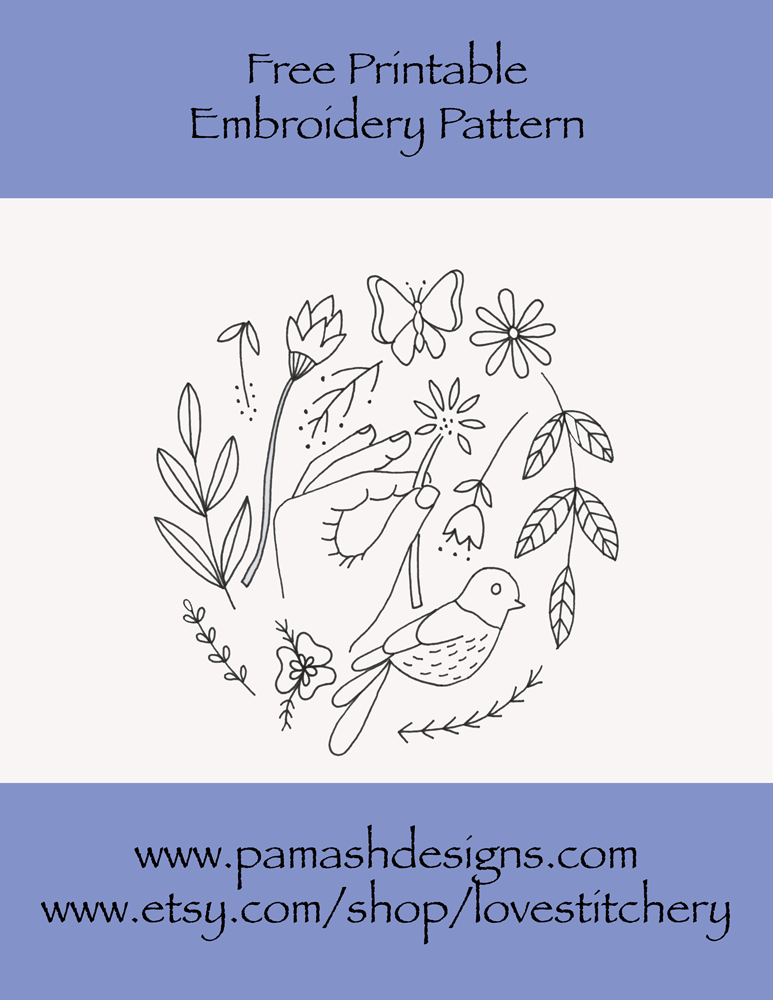
Get your free printable by clicking HERE and then stitch along with me.
if you don’t have these supplies, don’t worry! I have a very simple and affordable kit in my shop with everything you would need to complete the project. If you are interested, there is a link at the end of the post.
Start by printing out the pattern. Once you have printed your pattern, tape it to a bright window. I use masking or washi tape so it’s easy to remove.

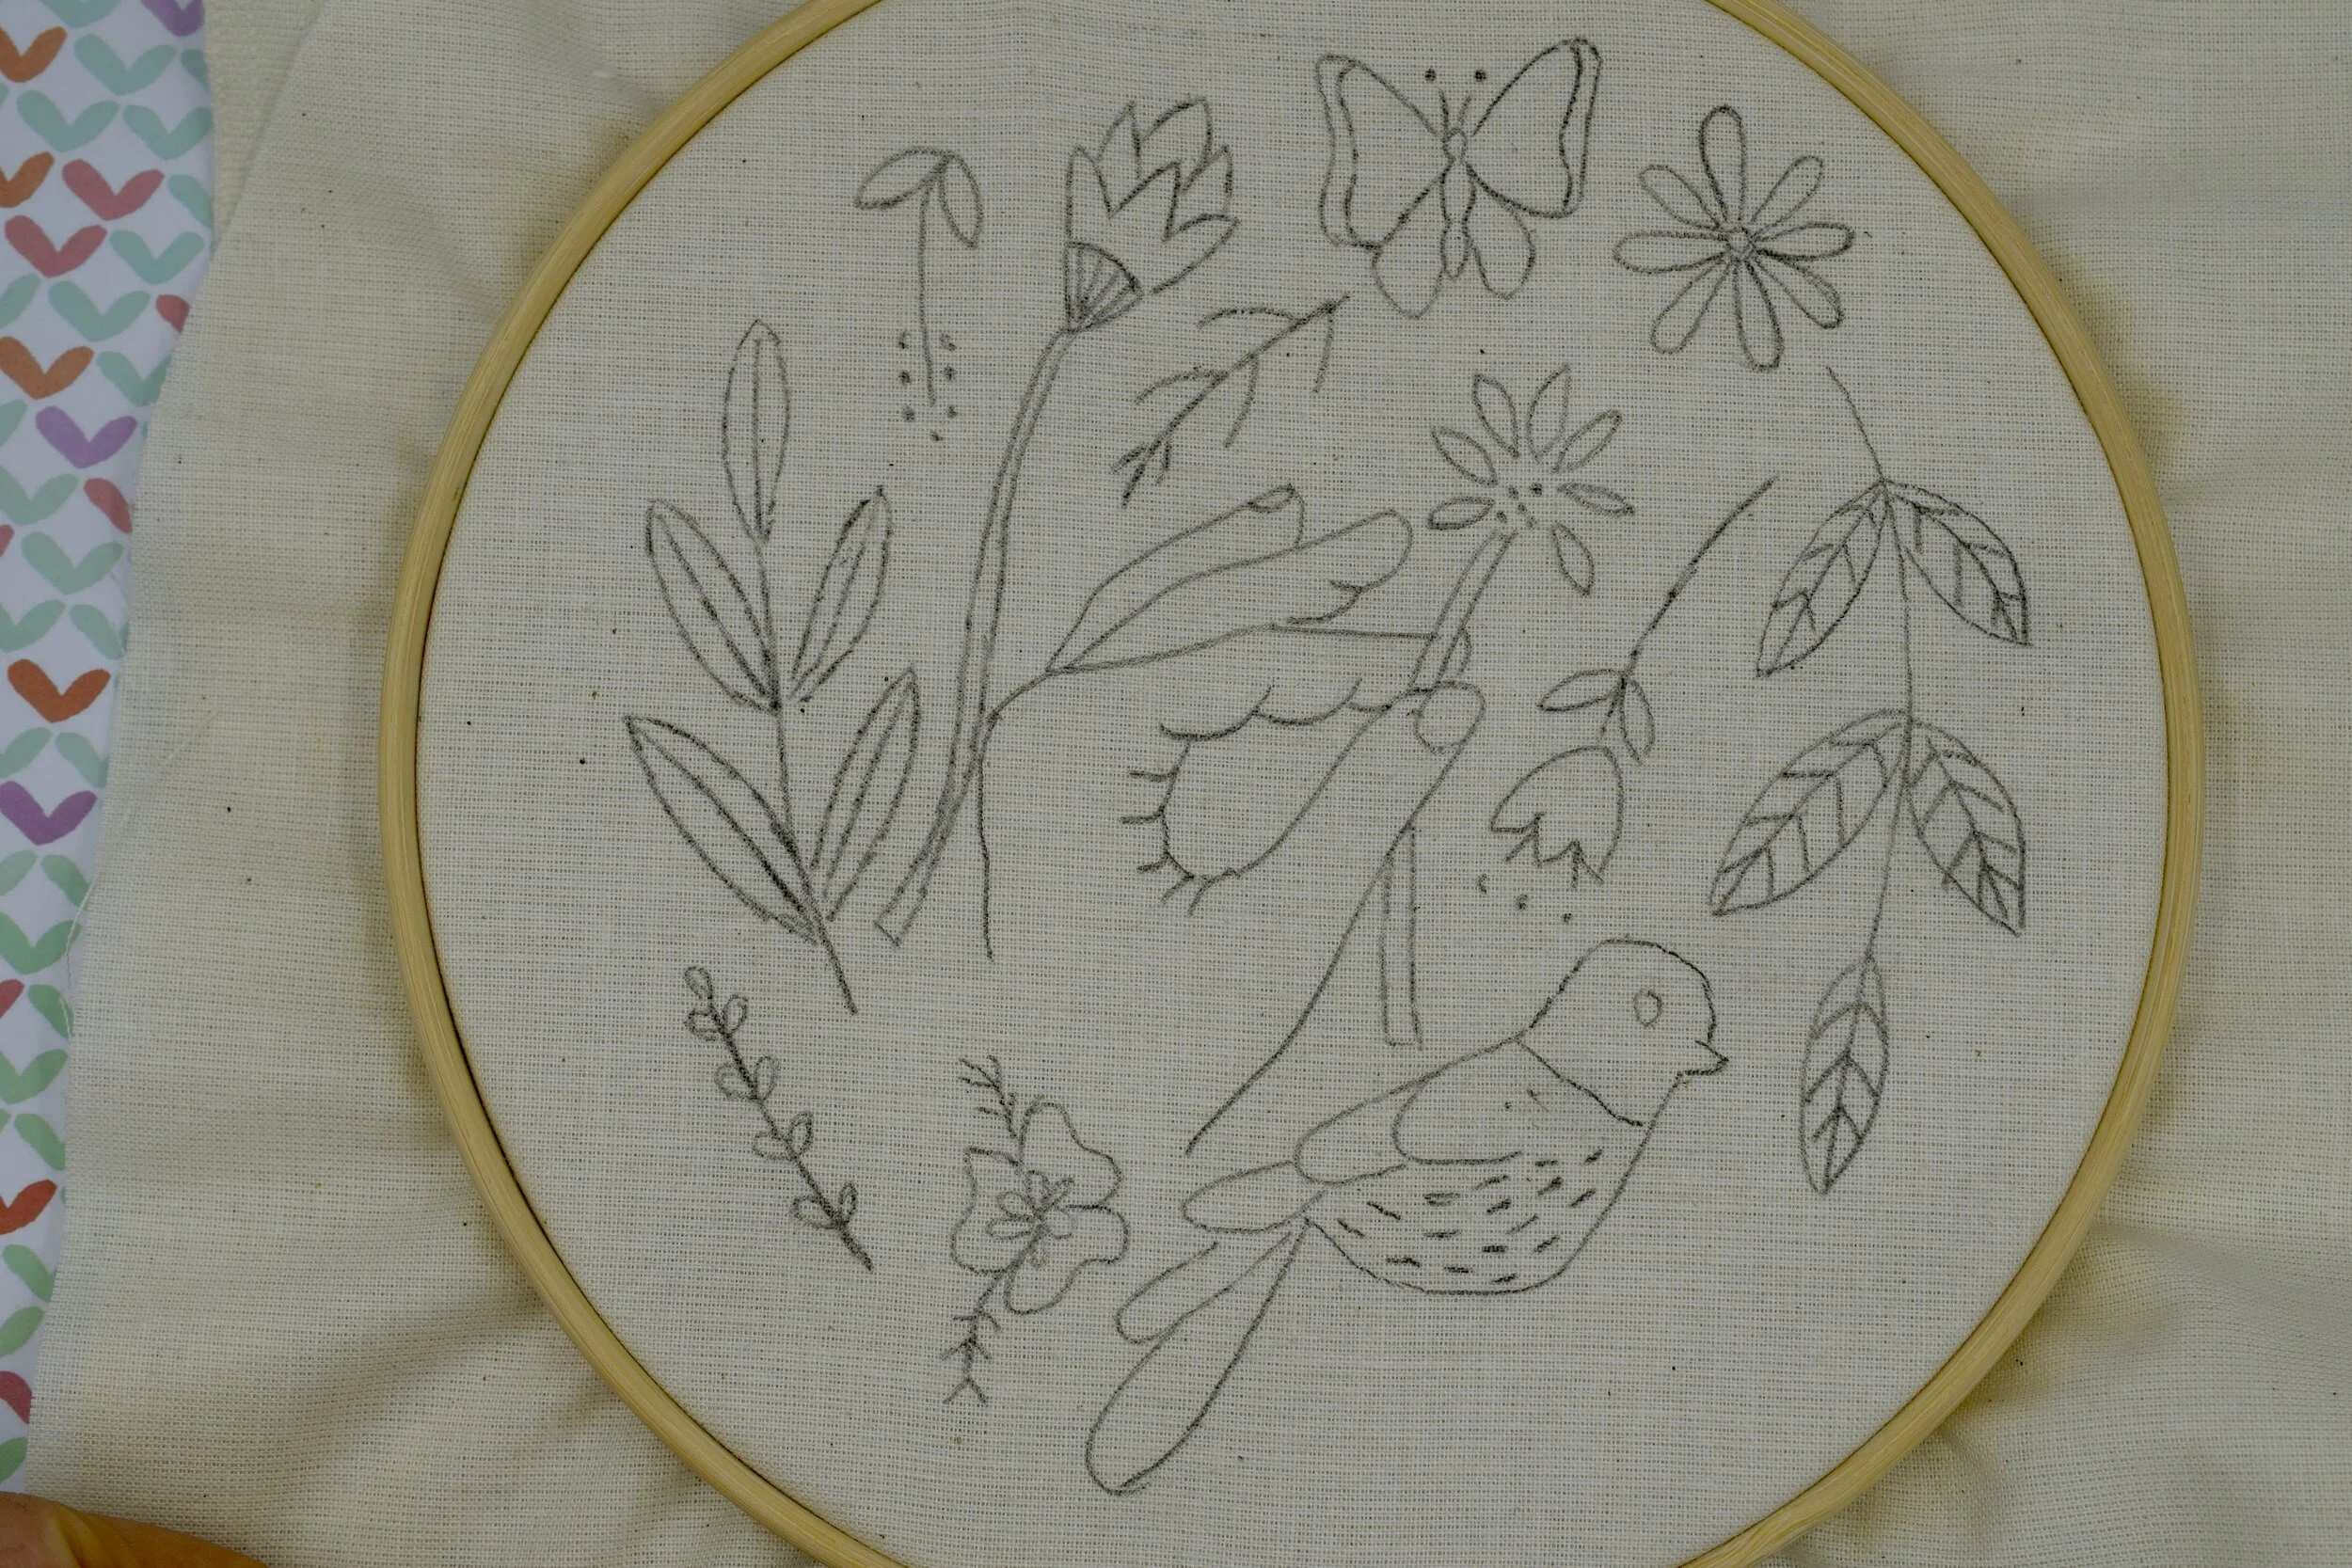
I like to use a simple cotton fabric (unbleached muslin or Kona cotton). Cut a piece that is big enough to fit in a six inch embroidery hoop with a little overlap.

Use a nice sharp pencil to trace the design onto your fabric. I like a mechanical pencil but a pen is fine too!


.This pattern is super easy to complete. Start by threading your needle. I like to use a size 8 (they come in a multi-pack). Below is a video of me threading a needle. I used two threads of a six stranded floss so first you see me separating the thread, then threading and knotting the needle.
Now start sewing! You can complete this whole pattern using just this one stitch, the BACKSTITCH. Bring your needle from up from behind the fabric until the knot catches. Start with a line to practice. Begin about one stitch length from the beginning of the line, as demonstrated in the video below. For a little more guidance click HERE to see my detailed tutorial on the BACKSTITCH.
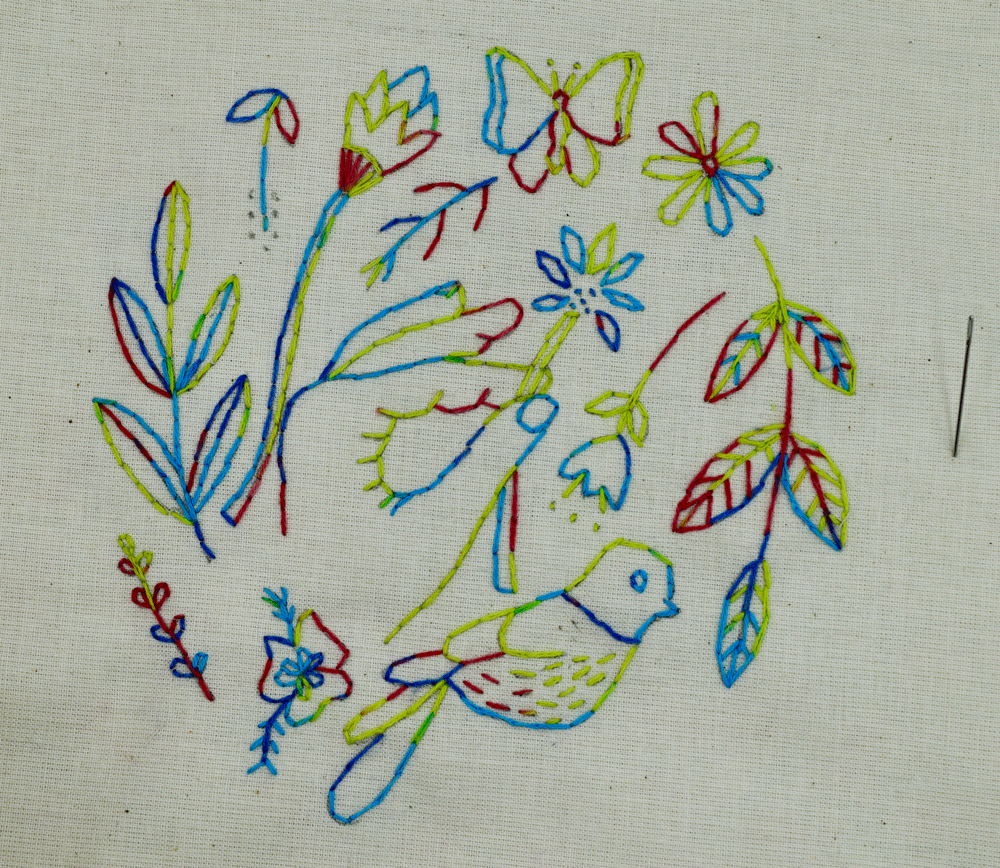
Above is the completed pattern. The whole thing was done in a few hours with less than one skein of variegated embroidery floss, using two threads.

When you get to smaller details and curved edges, make your stitches smaller. This will help the stitches follow the curve and not look jagged and sharp.

For the areas with dots, just make a tiny stitch.
Feel free to get fancy and add different stitches. You can also experiment with the thickness of threads by using more or less strands.

This pattern was completed using satin stitch, french knots, backstitch, lazy daisy and straight stitches. I used one thread for the detailed black outline and two threads for the fillers.
Click on any of the following stitches for a detailed tutorial:
When you are done sewing, make a running stitch around the fabric at the back of the hoop and knot to secure. There is a visual of this process HERE.
If you don’t have the supplies readily available, I created a kit on my Etsy shop. I kept it very simple and affordable. It contains :
Fabric with the pattern printed on it and already fitted into a 6 inch hoop.
One skein of variegated thread
One needle
That’s it!!!

Click HERE to see the listing.
I have so many great ideas on ways you can apply elements of this embroidery to different projects that can keep you busy for hours of stitching fun.
Print as many as you like and sew along with me!!! I’d love the company.
Wishing your health and well being with all my heart.
Very Warmly.
Pam